Decision Force Field Help
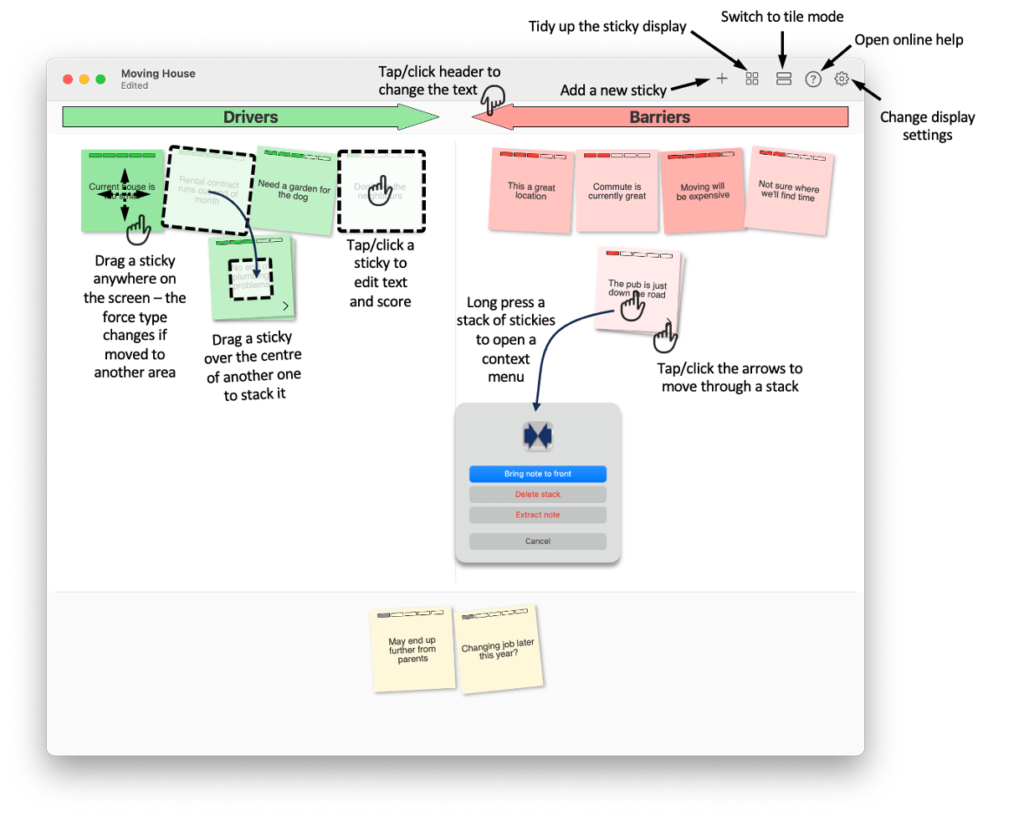
In sticky mode, each force appears on a coloured sticky. Click the “+” button in the toolbar to add a new sticky, and assign it as a driver, barrier or to be decided later. You can move stickies around by tapping/clicking and dragging. It will be coloured automatically depending on where it is dropped: green for drivers, red for barriers, yellow for undefined/parked. Dropping a sticky over the centre of another one will combine the stickies into a single stack.
Tapping/clicking on a sticky (or stack of stickies) allows you to edit the sticky and, if scoring is enabled, assign a score. In a stack of stickies, use the right and left arrows to move through the stack. Long click on a stack to bring up a menu which allows you to bring a sticky in the middle of the stack to the front, extract the shown sticky into its own stack or to delete the stack completely. Click the clean-up button in the toolbar to sort the stickies into a logical structure.
With the Settings button (gear wheel) in the toolbar you can change the column headers style, and choose a flat or cursive font for the stickies.

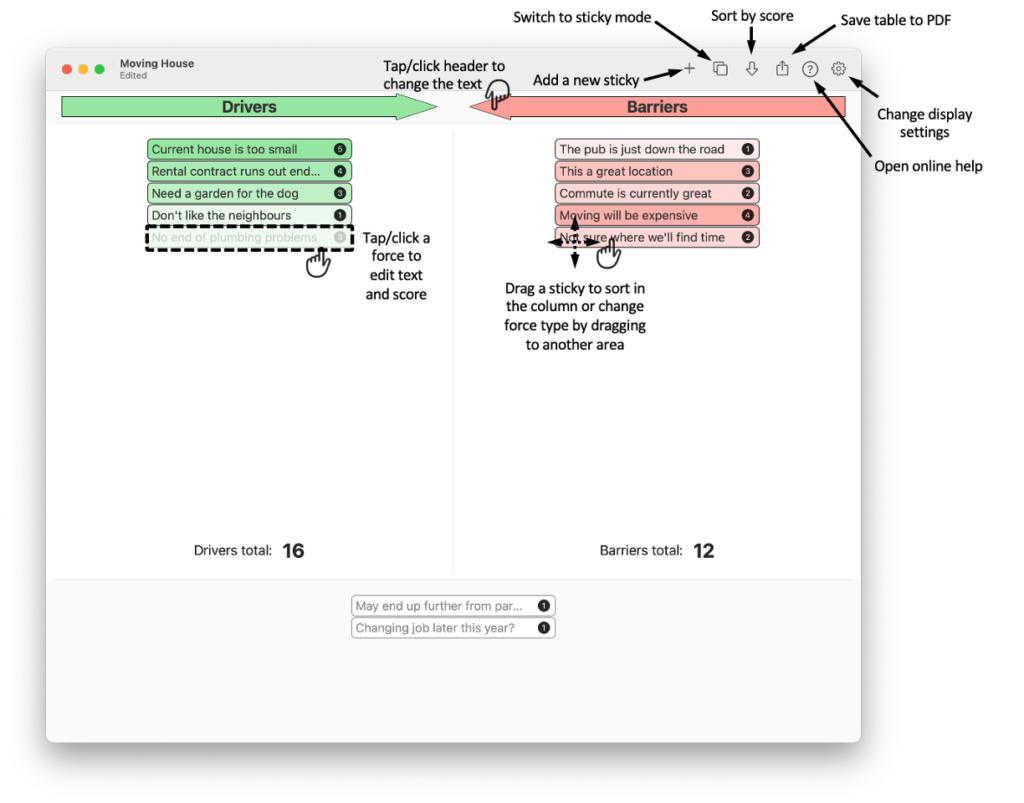
Switch to tile mode in the toolbar for a clean representation of the force field. Note that only the front sticky in a stack of stickies appears in tile mode (to change the front sticky go back to sticky mode, use the arrows in stack to find the desired sticky then long click and select “bring note to front” to make it the front sticky).
Using the Settings button in the toolbar you can choose a text only or tiled display of the forces. Forces can still be tapped/clicked and to edit the text/score and dragged to change the order. Click the score sort button in the toolbar bar to sort by strength of force, if scoring is enabled.
