Decision Table Help

Decision Table operates in two modes controlled by the pen symbol at the top right of the tool bar.
Editing Mode
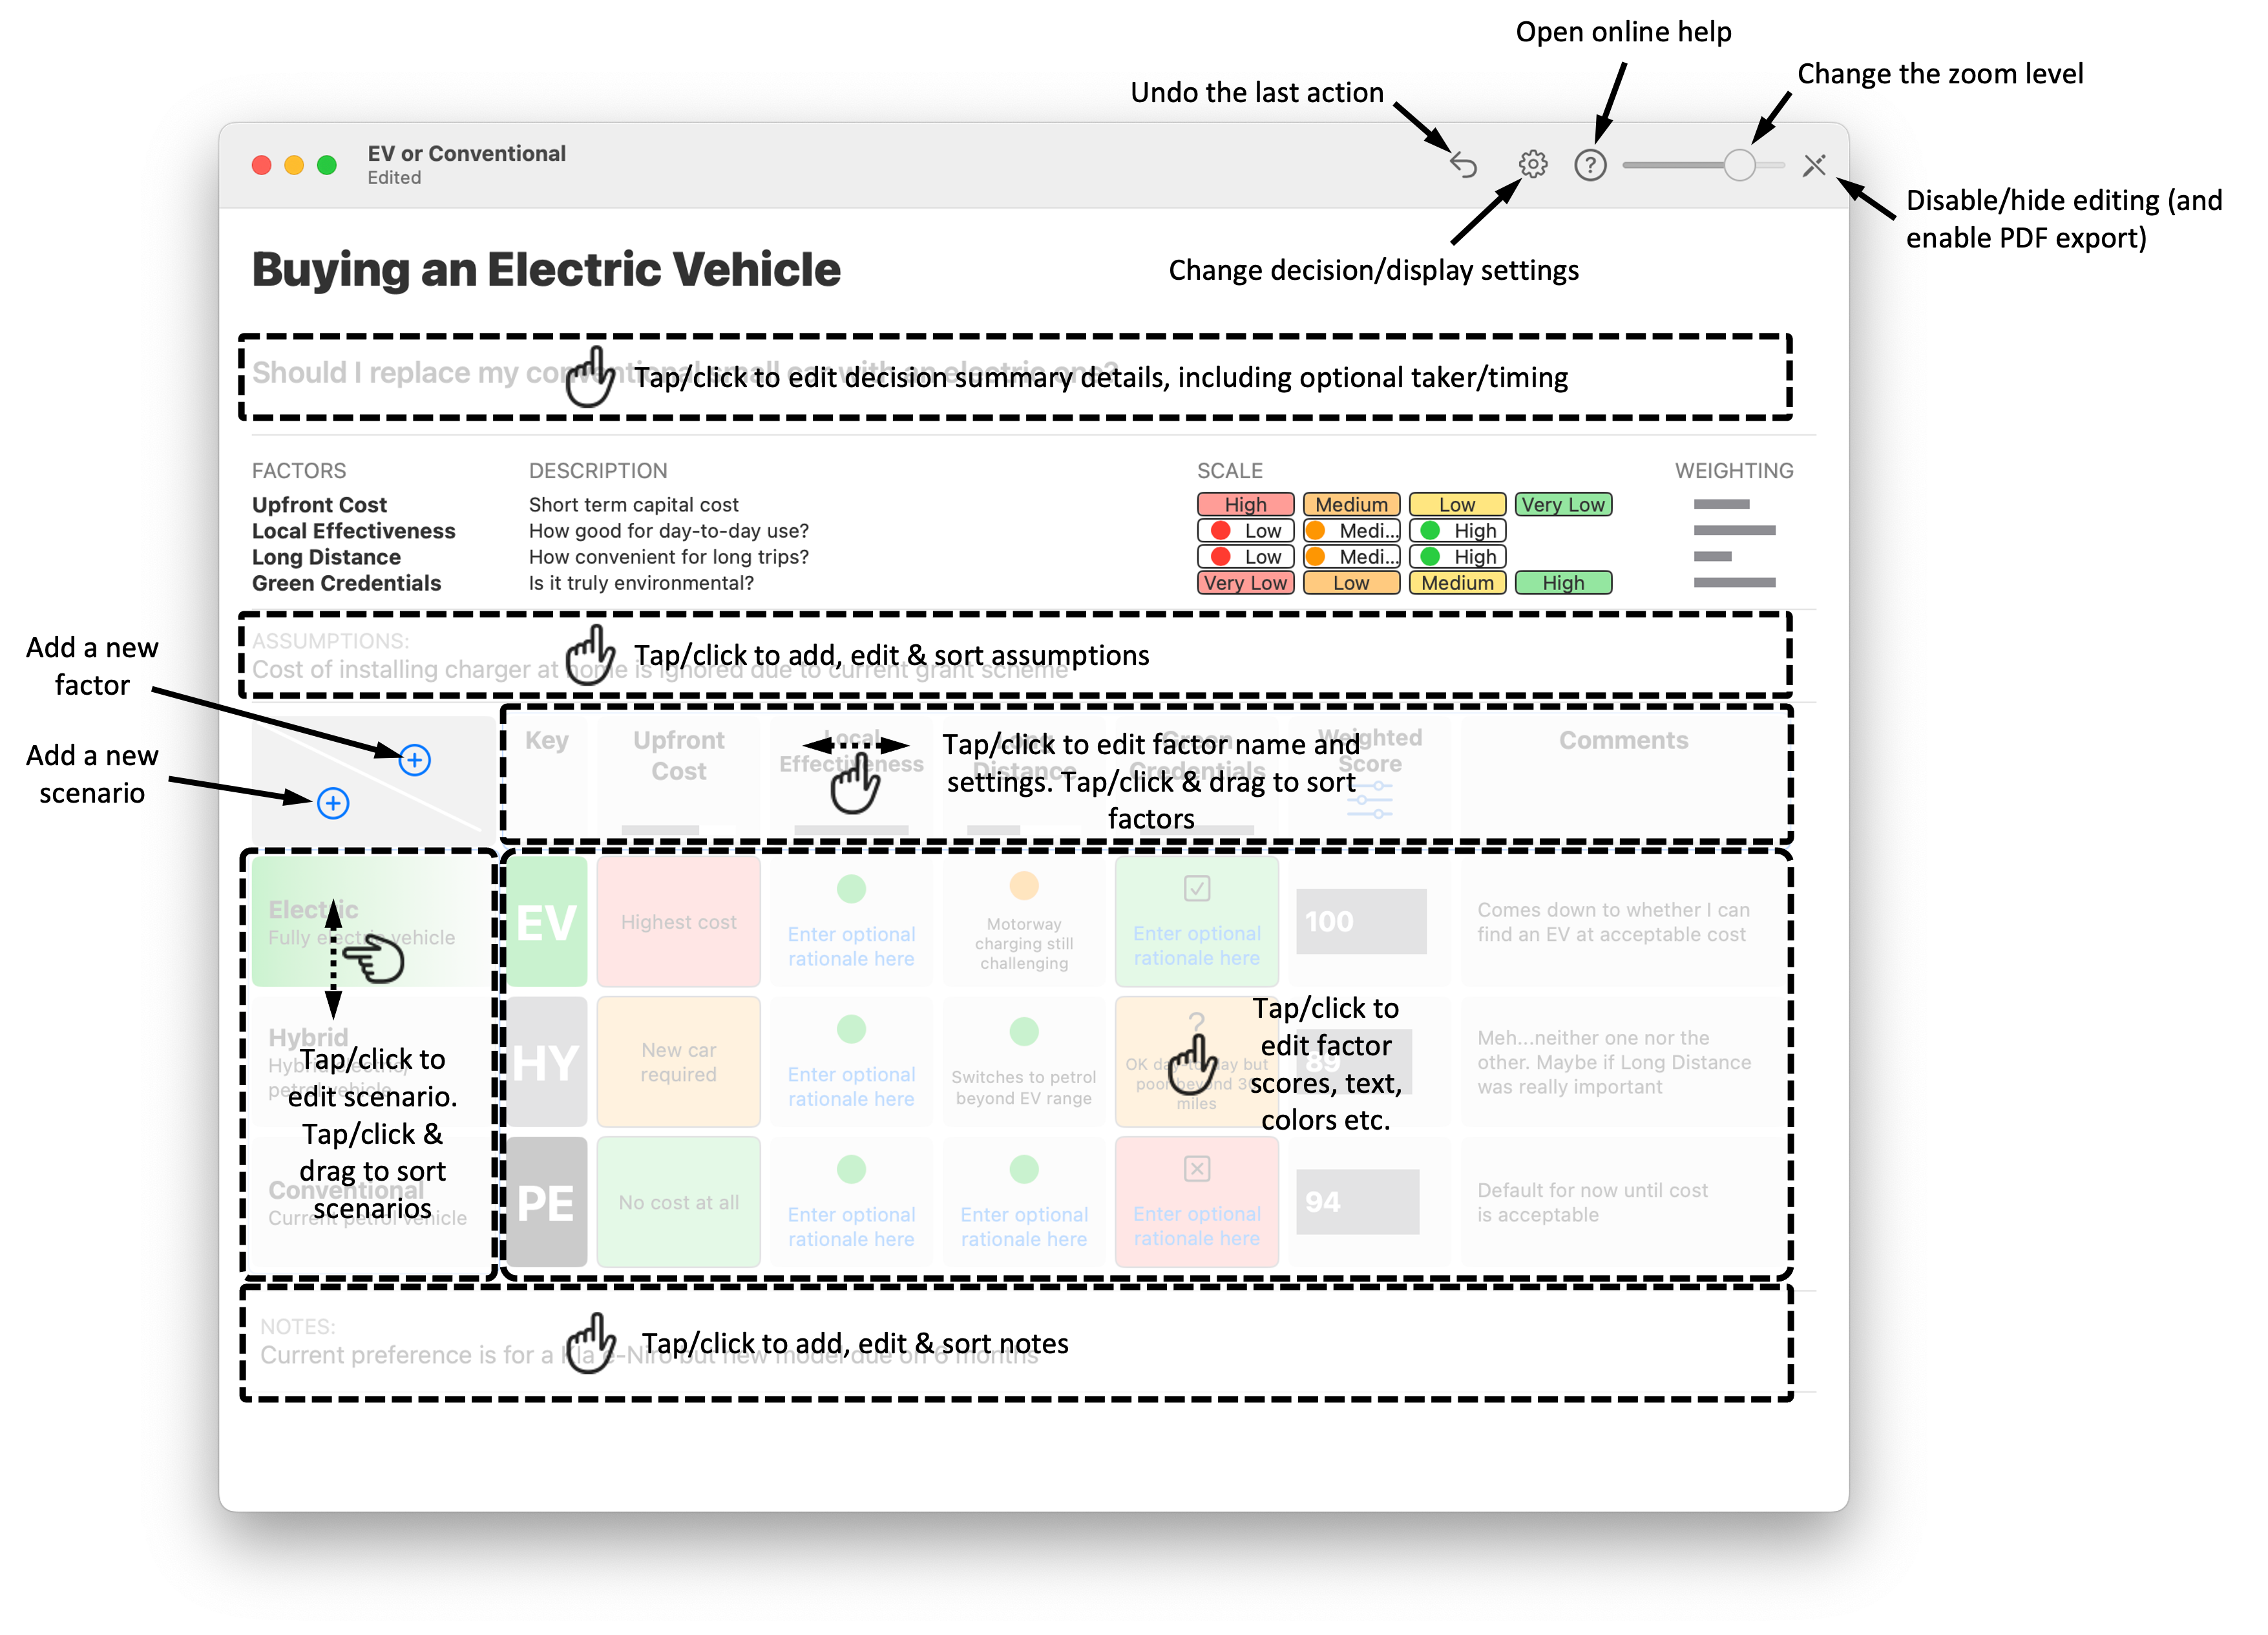
In editing mode, the decision can be modified by tapping or clicking in the following sections;
- in the decision summary section to edit the decision title/description and optionally include who the decision taker is and what the timing of the decision is.
- in the assumptions or notes tables to add, edit or sort assumptions.
- on any column header in the decision matrix to edit the name and description of the decision factor in that column, to temporarily hide it or to delete it completely. Some factors have additional options: in Comment factors select one of 3 width options selected and a text size which can be automated (varied with the length of text) or fixed at one of 5 sizes. In Traffic Light (or Image Scale) factors you can reverse the text associated with the color scale. In KPI (numerical) factors you can define the number of decimal places to be shown, select a currency symbol and define whether a high number is good or bad for weighting the decision. In Rating factors, you can also define whether a high rating is good or bad for weighting the decision
- in any row header in the decision matrix to edit the name and description of the scenario in that row, to temporarily hide it or to completely delete it; any one scenario can also be set as “recommended” (shown with a green gradient in the row header).
- in any other matrix cell in the to set the score and/or text for the relevant combination of scenario (row) and factor (column); the options available depend on the factor type. For Display Key factors you can change the 1-2 letter key and the color of the box. For Comment factors the text and its color can be changed. For Traffic Light/Image Scale cells, select the score from the options in the scale bar, change the high/low order of the text/color scale, and add a short explanatory text with an optional supplementary image. For Rating factors, the
In both column and row headers, tap/click, then hold and drag to sort the order of factors or scenarios respectively – the drop point of the dragged element is shown to guide sorting.
Add new scenarios or factors using the “+” buttons at the top left of the decision matrix, and if any are hidden, an eye button will be available to unhide hidden elements. When adding a factor, the factor type is selected from the available list. For some factors, the row header will show a question mark, indicating additional elements need to be defined e.g. for the Rating factor type, the rating symbol and number of steps is a choice. Factor types can only be changed by deleting and re-adding the factor.
If the decision includes a weighting factor, click its column header to set the individual relative weighting of the factors that contribute to the final weighting of each scenario. Text factors like Comment and Display Key do not contribute to weightings.
In the toolbar, the last action can be undone with the Undo button, while the settings gear opens a dialog where different elements of the decision can be shown or hidden. Other options include two grid display options, with and without background shading of cells in the decision matrix, the option to widen the row hide of every scenario by 2 or 3 times,
Display Mode
When not in editing mode, the decision is displayed cleanly without buttons and placeholders. All buttons are disabled, except in the tool bar, where a sharing button appears allowing export of the decision, as shown, to a PDF file.